My big winter purchase of a set of secondhand benches and chairs has led to my first big restoration project and a timeframe of finishing before the summer sun comes.
I hope I have everything I need. I had to buy a lot of tools but if I deduct the cost of these (as I'll be using them in the future), then the expenditure wasn't too much.
Prep work: Santity check with my design guru Gorgeous David. I searched Pinterest for similar projects, decided on which elements I was going to try from those. Wrote a list of supplies I needed. I went to Bunnings DIY store with a long list. The staff were really helpful and showed me alternatives to cut out some of the layers/process. Then back home and waited for a dry and child free day to get started.
Step 1: Wash down the chairs
Step 2: C
hristen the wire brush with a lot of muscle, scrubbing the rust off the wrought iron framework. Using wire wool to get inbetween the curvy bits. Finish with electric sander to make it nice and smooth.
Step 3: Wash wrought iron framework with soapy water and hose off
Step 4: Disassemble the wood slates from the frame. I thought this would be the easy bit but it turned out to be the most frustrating and time consuming as the rusty screws weren't moving a notch and eventual the screw head rubbed away. First I tried WD40 then more muscle power. In the end I had to saw through the screws with a hacksaw.

Step 5: Sand the wooden slates then give up after deciding the wood wasn't good enough so I added Step 5A.
Step 5A: Buy replacement wood. A good decision as the wood was cheap and had a lovely natural pattern to it. I got it cut to size to save me time.
 Step 6: Paint the frames, let them dry over night before turning over to do the other side.
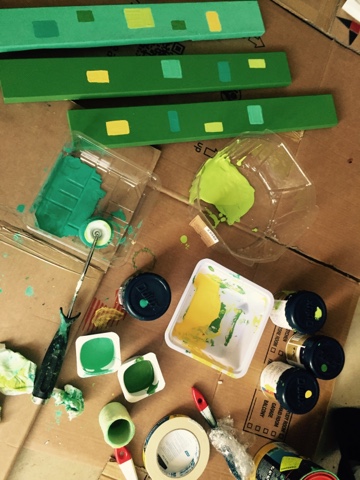
Step 7: Paint wooden planks.
Step 8: Wash down frame to remove any stickiness from the iron paint.
Step 9: Put it all back together.
Step 10: Sit back with a glass and enjoy the newly renovated seat.
Top Tips I picked up from Pinterest and from my own mistakes:
- Ask for advice in your DIY store, I got some great help from mine, including free help fixing my jammed electric screwdriver.
- Take photos of every stage as you take the chair apart. Even if it only has a few parts it's easy to get it wrong when you put it back together.
- Put an elastic band cross your paint can to take the drops, helps keep the rim of the can clear of paint
- Take a photo of your paint can before you get it covered in paint so you can read the instructions and have the full details should you need more of the same paint.
- Wrap your paint brushes in clingfilm between coats
- If you get rusty nails that aren't budging you can screw through them with an electric screwdriver, or just cut right through them.
- Paint the underneath first so that when you turn it over to paint the top, the final drips will be on the bottom.
- I don't have a proper workshop so used empty plastic milk bottles to prop the frame up while I painted it so i could reach all the curves.
And the first bench is finished, inspired by Sydney beaches with sand, green spaces and clear blue water
The second bench is finished. I managed to save most of the original wood and decided on a tree design On one side.